18
Wax Exterior
There are three methods to wax a vehicle’s exterior surfaces:
- Machine application. Uses either ROYAL GLAZE or TROPICAL GOLD with a dual-action (random orbital) polisher and polishing pad.
- Hand application. Uses either ROYAL GLAZE or TROPICAL GOLD with a hand-held wax applicator pad.
- Spray wax. Uses BEAD BUILDER with a trigger sprayer.
Choose the best method based on the tools you have available, the total allotted time to wax the vehicle, and the wax product requirements. There are currently four (4) Auto Valet waxes available.
- ROYAL GLAZE: a cleaner and a wax. Gently cleans exterior painted surfaces and removes spider-web scratches. Use by hand or with a machine.
- TROPICAL GOLD: a cream carnauba finishing wax. Produces a deep-shine, hard-shell finish. Covers imperfections and creates a repellant coating. Use by hand or with a machine. Environmentally friendly.
- BEAD BUILDER: a spray wax and ceramic coating enhancer. Enduring luster, gloss, and sleekness; removes dust, smudges, and fingerprints. Use by hand, with a trigger sprayer to apply and a cloth to wipe off. The fastest wax to use.
The time to wax the vehicle’s painted surfaces is dependent on the exterior surface area, and the application method. Once the waxing is complete, the areas of application will have a deep, glossy shine and contain a protective layer. View the products used tab for Auto Valet products and accessories relating to this detailing task.
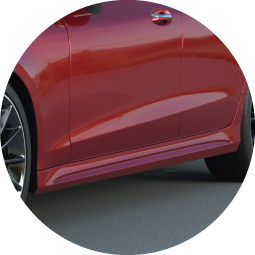
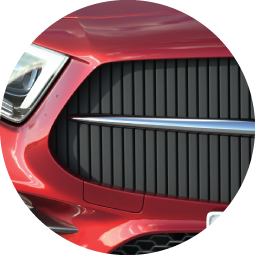
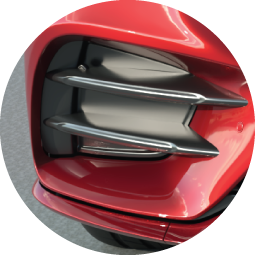
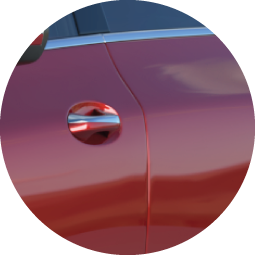
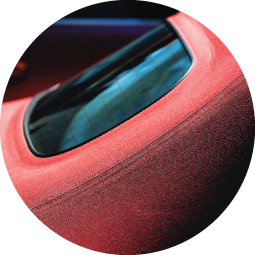
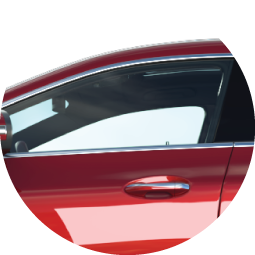
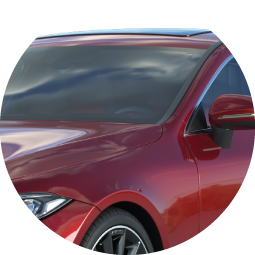
AREAS OF APPLICATION
Painted Surfaces


PRODUCTS USED
PRODUCTS USED
Detailing task 18: Wax Exterior
.jpg)
.jpg)
.jpg)
-(web).jpg)
.jpg)
-(web).jpg)
.jpg)
-(web).jpg)
-(web).jpg)
-(web).jpg)
-(web).jpg)
.jpg)
.jpg)
Directions
METHOD 1: MACHINE APPLICATION
Uses ROYAL GLAZE, or TROPICAL GOLD with a dual-action (random orbital) polisher and polishing pad.STEP 1: PREPARE THE AREAS OF APPLICATION
Complete an exterior wash using a vehicle wash soap, and dry the vehicle. Ensure the vehicle’s exterior painted surfaces are clean and dry; free from dust, debris, and grime. If necessary, complete paint correction, with compounds and polishes, to ensure the painted surfaces are smooth and free from imperfections. Use a car duster to remove excess dust from the exterior surfaces.STEP 2: SPREAD THE WAX
Use either a foam or microfiber polishing pad on a dual-action (random orbital) polisher. Work on one vehicle panel at a time for best results, when spreading and applying. Shake the wax before use. Place a quarter-sized (approx. 2.5 cm or 1 inch diameter) dab of wax onto the pad. Spread the wax evenly around the painted panel surface. Depending on the surface area of the panel, more or less wax may be required.STEP 3: APPLY THE WAX
Position the pad flat on the vehicle surface and start the dual-action polisher. Apply the wax using steady pressure, holding it firmly to keep the polisher from wandering. Complete an entire panel at a time, applying in a circular motion. Ensure every area of the panel has a thin coat before stopping the polisher. Allow the wax a few minutes to dry to a haze.STEP 4: REMOVE RESIDUE AND REVIEW YOUR WORK
Buff the wax with a dry, soft microfiber cloth, turning the cloth frequently. Review work. If necessary, repeat steps 2 to 4, to cover missed areas.METHOD 2: HAND APPLICATION
Uses NORTHERN LIGHTS, ROYAL GLAZE, or TROPICAL GOLD with a hand-held wax applicator.STEP 1: PREPARE THE AREAS OF APPLICATION
Complete an exterior wash using a vehicle wash soap, and dry the vehicle. Ensure the vehicle’s exterior painted surfaces are clean and dry; free from dust, debris, and grime. If necessary, complete paint correction, with compounds and polishes, to ensure the painted surfaces are smooth and free from imperfections. Use a car duster to remove excess dust from the exterior surfaces.STEP 2: APPLY THE WAX
Use a hand-held wax applicator pad. Shake the wax before use. Place a quarter-sized (approx. 2.5 cm or 1 inch diameter) dab of wax onto the pad. Apply the wax onto the painted surfaces in a circular motion. Add small dabs of wax to the applicator pad as needed. Allow the applied wax a few minutes to dry to a haze.STEP 3: REMOVE RESIDUE AND REVIEW YOUR WORK
Buff the wax with a dry, soft microfiber cloth, turning the cloth frequently. Review work. If necessary, repeat steps 2 to 3, to cover missed areas.METHOD 3: SPRAY WAX
Uses BEAD BUILDER with a trigger sprayerSTEP 1: PREPARE THE AREAS OF APPLICATION
Complete an exterior wash using a vehicle wash soap, and dry the vehicle. Ensure the vehicle’s exterior painted surfaces are clean and dry; free from dust, debris, and grime. If necessary, complete paint correction, with compounds and polishes, to ensure the painted surfaces are smooth and free from imperfections. Use a car duster to remove excess dust from the exterior surfaces.STEP 2: APPLY THE SPRAY WAX
Spray BEAD BUILDER onto the vehicle’s exterior surface. No wait time is required, once the wax is applied. Use the BEAD BUILDER liquid conservatively for best results.STEP 3: REMOVE RESIDUE AND REVIEW YOUR WORK
Wipe the areas of application with a clean, dry cloth or microfiber towel. Review work. If necessary, repeat steps 2 to 3, to cover missed areasTips
- For the longest-lasting results, strip all the previous wax off of the vehicle before applying new wax. Strip the wax by using a water-based cleaner degreaser, such as PURPLE POWER, during the wash process.
- Do not apply waxes in direct sunlight.
- Remove the microfiber towel tags before using them on painted surfaces, to eliminate scratching or marks on the paint.
- When waxing, be mindful of the panel gaps so the wax is not pushed into them. If wax does get stuck in between the panels’ gaps, remove using a microfiber towel.
- Be sure to carefully read and follow all product instructions and precautions, on the product labels.
MACHINE APPLICATION
- If heavy compounding is completed on the exterior painted surfaces, thoroughly wash the vehicle exterior before applying a wax.
- Ensure new pads are de-fluffed and used pads are free from clumping, before using.
- Constantly move the polisher when using. This will avoid the paint from heating up too much; burning the paint is only fixed by repainting. As well, constant movement is essential to achieve a uniform finish.
- To keep the cord from getting in the way and dragging on the painted surface of the vehicle, hang the cord over your shoulder.
- If the application pad becomes congested with wax, use a brush to clean it out.
HAND APPLICATION
- Apply the wax in small sectioned panels. Wax the entire vehicle exterior, allow the wax to dry to a haze and then buff the entire exterior.
SPRAY WAX
- When using BEAD BUILDER ensure surfaces are cool to the touch before applying.
- Use conservative amounts of BEAD BUILDER when applying, for the best results.
FREQUENTLY ASKED QUESTIONS
There are currently four (4) Auto Valet waxes available.
- ROYAL GLAZE: a cleaner and a wax. Gently cleans exterior painted surfaces and removes spider-web scratches. Use by hand or with a machine.
- TROPICAL GOLD: a cream carnauba finishing wax. Produces a deep-shine, hard-shell finish. Covers imperfections and creates a repellant coating. Use by hand or with a machine. Environmentally friendly.
- NORTHERN LIGHTS: a quick wax. Quick to apply, dry, and wipe off. Durable, non-greasy wax; removes light oxidation and imparts a deep gloss. Use by hand.
- BEAD BUILDER: a spray wax and ceramic coating enhancer. Enduring luster, gloss, and sleekness; removes dust, smudges, and fingerprints. Use by hand, with a trigger sprayer to apply and a cloth to wipe off. The fastest wax to use.
Waxing frequency and longevity depends on the type of wax used, the surrounding climate, and the soap used to wash the vehicle. Natural or synthetic waxes last between one to four months. It is important to ensure the paint is free of dirt, tar, grease, and other surface contaminants before applying a wax to ensure effective adherence.
Surrounding climate. Climate affects the durability of waxes. Harsh weather conditions such as rain, wind, snow (and the accompanying road salts) will break the bond between the resin and the painted surface quicker than dry, mild conditions. Constant exposure to bright sunlight will also accelerate wax deterioration.
Vehicle wash soap. Use a pH neutral soap, not a highly alkaline soap. The alkalis will strip resins from the painted surface, lessening gloss and exposing the surface to the elements.
No, waxes including ROYAL GLAZE, TROPICAL GOLD, NORTHERN LIGHTS, and BEAD BUILDER are not body shop safe.
When washing a waxed surface, use a pH neutral soap, not a highly alkaline soap. The alkalis will strip resins from the painted surface, lessening gloss and exposing the surface to the elements. Diluted AUTO WASH is the recommended pH neutral soap, for washing waxed surfaces, to extend the longevity of the applied wax.