16
Paint Correction
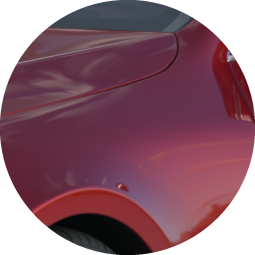
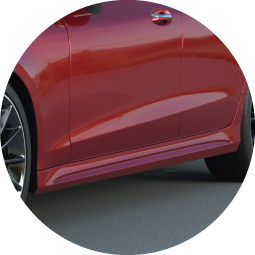
Paint correction techniques are necessary to successfully eliminate scratches, overspray, heavy oxidation, swirl marks, surface imperfections, hazing, dullness, holograms and acid rain damage from a vehicle’s exterior painted surface. By using compounds and polishes, the desired gloss and smoothness is restored back to the vehicle’s dull exterior painted surfaces.
Imperfections can accumulate on any exterior painted surface of a vehicle. Accumulation, including the intensity of the imperfections, is dependent on many factors. Some examples include the usage of brush tunnel washes, the usage of a snow/ice brush, or driving conditions. Paint imperfections are more noticeable on black and dark coloured vehicles.
To effectively remove imperfections from a vehicle’s exterior surfaces, there are two methods.
- Two-stage compound and polish. Uses SUMMIT SUPER COMPOUND and SUMMIT SUPER POLISH. SUMMIT SUPER COMPOUND is first used to remove deep scratches, overspray, and heavy oxidation; and is followed by SUMMIT SUPER POLISH to eliminate finer paint surface defects and leave a mirrored glossy finish. You will require a rotary polisher, dual-action (random orbital) polisher, an LED light, and masking/taping materials for this task method.
- One-stage polish. Uses 50/50 ONE STEP. 50/50 ONE STEP is used to polish and finish in one simple application. Removes swirl marks, slight surface imperfections, light oxidation, and brings back the colour of faded and dull finishes. Leaves painted exterior surfaces smooth and waxed. You will require a dual-action (random orbital) polisher (if applied by a machine), and masking/taping materials for this task method.
Choose the best method based on the vehicle’s paint correction requirements, including the intensity of scratches.
The time to correct the paint on the vehicle exterior is dependent on the exterior surface area, the intensity and amount of imperfections, and the chosen method. Once paint correction techniques are applied, the areas of application will be glossy, smooth, and free from imperfections. After the paint has been corrected, it is best to apply a paint protectant to the painted surfaces, using either a wax or coating.
Safety supplies include goggles, an apron, a mask, and impervious gloves. View the products used tab for Auto Valet products and accessories relating to this detailing task.
AREAS OF APPLICATION
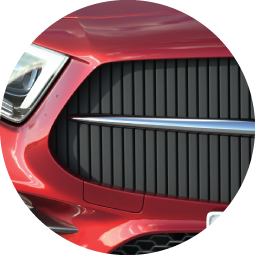
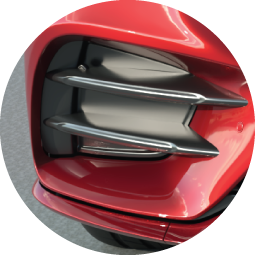
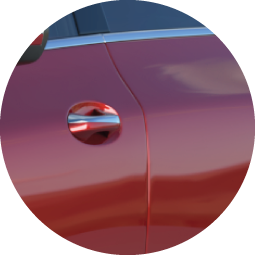
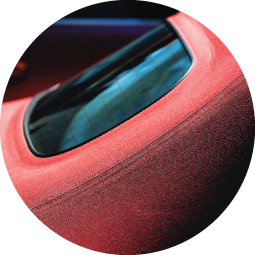
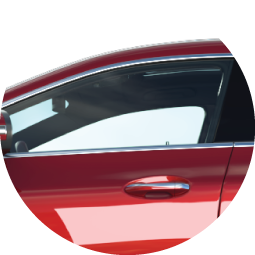
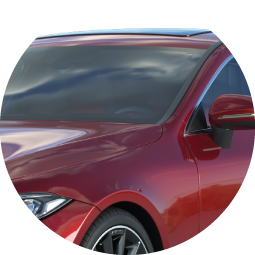
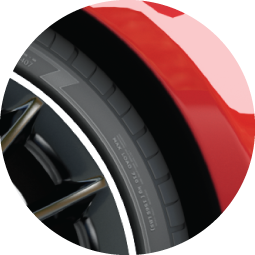
Painted Surfaces


PRODUCTS USED
PRODUCTS USED
Detailing task 16: Paint Correction
.jpg)
.jpg)
.jpg)
.jpg)
-(web).jpg)
-(web).jpg)
-(web).jpg)
-(web).jpg)
-(web).jpg)
-(web).jpg)
-(web).jpg)
.jpg)
-(web).jpg)
-(web).jpg)
-(web).jpg)
-(web).jpg)
.jpg)
-(web).jpg)
-(web).jpg)
-(web).jpg)
.jpg)
.jpg)
Directions
METHOD 1: TWO-STAGE COMPOUND AND POLISH
Uses SUMMIT SUPER COMPOUND and SUMMIT SUPER POLISHSTAGE 1 - COMPOUND
To remove deep scratches, scuffs, imperfections, overspray, and heavy oxidation.STEP 1: PREPARE THE AREAS OF APPLICATION
Complete an exterior wash using a vehicle wash soap, and dry the vehicle. Ensure the vehicle’s exterior painted surfaces are clean and dry; free from dust, debris, and grime. Protect any vulnerable surfaces, such as black unpainted plastic or rubber seals, to avoid unwanted damage by applying a dressing or using tape.STEP 2: REVIEW PAINTED SURFACES AND DETERMINE THE USAGE PAD
Check for scratches on the painted surface using the thumbnail check method. Gently run your thumbnail across the scratch. If the groove of the scratch is felt, it is likely that the scratch is too deep to be completely removed from the painted surface. Use either a foam or wool pad designed for cutting and compounding and a rotary polisher. Choose a pad based on scratch intensity; using heavier cut pads for deeper, more intense scratching.STEP 3: SPREAD THE COMPOUND
Work on one vehicle panel at a time for best results, when spreading, applying, and removing. Shake SUMMIT SUPER COMPOUND before use. Place a quarter-sized (approx. 2.5 centimetres or 1-inch diameter) dab of SUMMIT SUPER COMPOUND onto the pad. Spread the compound evenly around the painted panel surface. Depending on the surface area of the panel, more or less compound may be required.STEP 4: APPLY THE COMPOUND
Start the rotary polisher and slowly increase the speed to avoid overspray. Apply the compound using steady pressure at speeds between 800 to 3,000 RPM (typically requires between 1,000 to 2,000 RPM). Constantly move the polisher across the surface; working the polisher in one spot without moving it can generate excess heat, causing damage to the clear coat. Ensure every area of the panel gets at least two passes with the polisher. Work in lines, in both directions of the panel (side to side, and up and down). Stop working the compound with the rotary polisher once the compound appears to be drying.STEP 5: REMOVE RESIDUE AND REVIEW YOUR WORK
Remove the compound residue with a clean microfiber towel. If the compound is dried on and hard to remove, use PARADE to lubricate and assist with removal. Review work. If scratches are still visible, repeat steps 2 to 5, and focus efforts on individual scratches. Follow by using the stage 2 polish.STAGE 2 - POLISH
To remove swirl marks, light imperfections, and holograms.STEP 1: PREPARE THE AREAS OF APPLICATION
Ensure the vehicle’s exterior painted surfaces are clean and dry; free from dust, debris, and grime. Remove deep scratches and imperfections by completing stage 1, using SUMMIT SUPER COMPOUND.STEP 2: SPREAD THE POLISH
Use either a foam or microfiber polishing pad on a dual-action (random orbital) polisher. Work on one vehicle panel at a time for best results, when spreading, applying, and removing. Shake SUMMIT SUPER POLISH before use. Place a quarter-sized (approx. 2.5 centimetres or 1-inch diameter) dab of SUMMIT SUPER POLISH onto the pad. Spread the polish evenly around the painted panel surface. Depending on the surface area of the panel, more or less polish may be required.STEP 3: APPLY THE POLISH
Position the pad flat on the vehicle surface and start the dual-action polisher. Apply the polish using steady pressure, holding it firmly to keep the polisher from wandering. Complete an entire panel at a time. Ensure every area of the panel gets a minimum of three passes with the polisher. Work in lines, in both directions of the panel (side to side and up and down). Stop working the polish with the dual-action polisher once the polish turns semi-transparent on the paint.STEP 4: REMOVE RESIDUE AND REVIEW YOUR WORK
Remove the polish residue with a clean microfiber towel. Review work. For easier detection of holograms and swirl marks, use an LED light. If marks are still visible, repeat steps 2 to 4, until the swirl marks and holograms are removed. Use a car duster to remove excess dust from the exterior surfaces. After the paint has been corrected, it is best to apply a paint protectant to the painted surfaces, using either a wax or coating.METHOD 2: ONE-STAGE POLISH
Uses 50/50 ONE STEPSTEP 1: PREPARE THE AREAS OF APPLICATION
Complete an exterior wash using a vehicle wash soap, and dry the vehicle. Ensure the vehicle’s exterior painted surfaces are clean and dry; free from dust, debris, and grime.STEP 2: APPLY THE ONE-STAGE POLISH
Shake 50/50 ONE STEP before use.Dual Action (Random Orbital) Polisher
Use a light cut or polishing pad (made from foam or microfiber). Place a quarter-sized (approx. 2.5 centimetres or 1-inch diameter) dab of 50/50 ONE STEP onto the pad. Spread the polish evenly around the painted panel surface. Constantly move the polisher at a steady speed across the surface. Stop working the one-stage polish once the painted surfaces have been covered. Allow 50/50 ONE STEP to dry.
Hand Applied
Use a clean soft cloth or bonnet. Apply to the exterior painted surfaces. Stop working the one-stage polish once the painted surfaces have been covered. Allow 50/50 ONE STEP to dry.
STEP 3: REMOVE RESIDUE AND REVIEW YOUR WORK
Remove the one-stage polish with a clean microfiber towel. Review work. If necessary, repeat steps 2 to 3, to remove swirl marks, slight surface imperfections, light oxidation, and bring back dull surfaces.Tips
- Scratches can only be removed if they have not gone through the paint clear coat, into the base coat. If a scratch has gone through the clear coat, compounding will minimize its appearance making it harder to detect on the painted surface.
- Ensure new pads are de-fluffed and used pads are free from clumping, before using.
- Constantly move the polisher when using. This will avoid the paint from heating up too much; burning the paint is only fixed by repainting. As well, constant movement is essential to achieve a uniform finish.
- To keep the cord from getting in the way and dragging on the painted surface of the vehicle, hang the cord over your shoulder.
- If the application pad becomes congested with compound or polish, use a brush to clean it out. Applies to foam, wool, and microfiber pads.
- If heavy compounding is completed on the exterior painted surfaces, thoroughly wash the vehicle exterior before applying a wax or coating.
- Always follow the stage 1 compounding with the stage 2 polish to ensure maximum gloss.
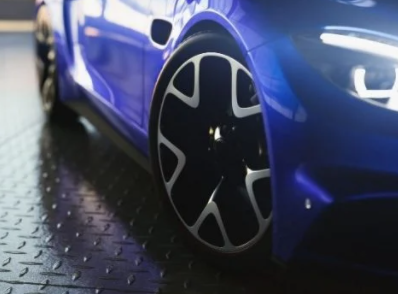
- To correct wheel rims, complete a two-stage compound and polish method using polishing cones. Cones are designed for the hard-to-reach areas on the wheel rims.
- Be sure to carefully read and follow all product instructions and precautions, on the product labels.
FREQUENTLY ASKED QUESTIONS
Lack of gloss on a painted surface results from three factors: (1) Oxidation of the exterior paint layer. Oxidation is the dulling of the painted surface that occurs when the sun’s ultraviolet rays deplete the paint’s natural oils and resins. (2) Scratches in the exterior paint layer. Scratches prevent light from reflecting uniformly from the painted surface, which limits gloss. In order to restore gloss, oxidation and scratches must be removed. (3) Lack of a protective coating on the exterior paint layer.
Once the surface is free of oxidation and scratches, and any swirl marks caused during buffing are removed, it is recommended to apply a wax or paint sealant to protect the surface against further oxidation and to intensify gloss.
The two-stage compounding and polishing system, using SUMMIT SUPER COMPOUND and SUMMIT SUPER POLISH, safely and effectively removes scratches and oxidation from a vehicle’s exterior painted surface. SUMMIT SUPER COMPOUND is first used to remove deep scratches, overspray, and heavy oxidation; and is followed by SUMMIT SUPER POLISH to eliminate finer paint surface defects and leave a mirrored glossy finish.
Swirl marks are light, circular scratches in the painted surface often caused by buffing with a compound. As the compound cuts away the oxidized paint layer and reduces the depth of deep scratches, light scratches typically remain, especially shown on darker colours. Safely and effectively remove swirl marks using SUMMIT SUPER POLISH. For a one-step polish and wax option, use 50/50 ONE STEP.
Diminishing Abrasives Technology (DAT) are abrasives that break down in physical structure, as they are applied. This technology is commonly used for compounds and polishes, designed for use on vehicle’s exterior painted surfaces and lamps to remove imperfections and restore gloss. Both compounds and polishes are typically formulated using an emulsion of water, solvent, surfactants, shine agents, and abrasives; compounds’ abrasives are larger, while polishes’ abrasives are finer.
Commonly, compounds, polishes, and waxes are designed for standard, glossy finish exterior painted surfaces. Only use products developed specifically for vehicles with matte exterior paint. Usage of products, designed for standard glossy finishes, can alter the look of the matte finish. It is not recommended for SUMMIT SUPER COMPOUND, or SUMMIT SUPER POLISH to be used on matte paint finishes.
Acid rain is etched in the painted surface caused by rainwater containing acid that accumulates on the vehicle's horizontal painted surfaces. As the water evaporates, the nitric and sulfuric acid remain and attack the paint. To repair the acid rain damage, use the two-stage compound and polish paint correction method, using SUMMIT SUPER COMPOUND and SUMMIT SUPER POLISH. Before paint correction techniques are applied, ensure to use an alkaline cleaner (with a pH above 7.0) to neutralize the area of application.